Missions
A Mission is the central object in neomia Lens: one video + its context + the resulting AI analysis. This page explains how to create missions, follow their progress, and manage them in bulk.
1. Creating a mission
Click New Mission from the Dashboard or from the Missions page. The mission creation form is divided into three sections.
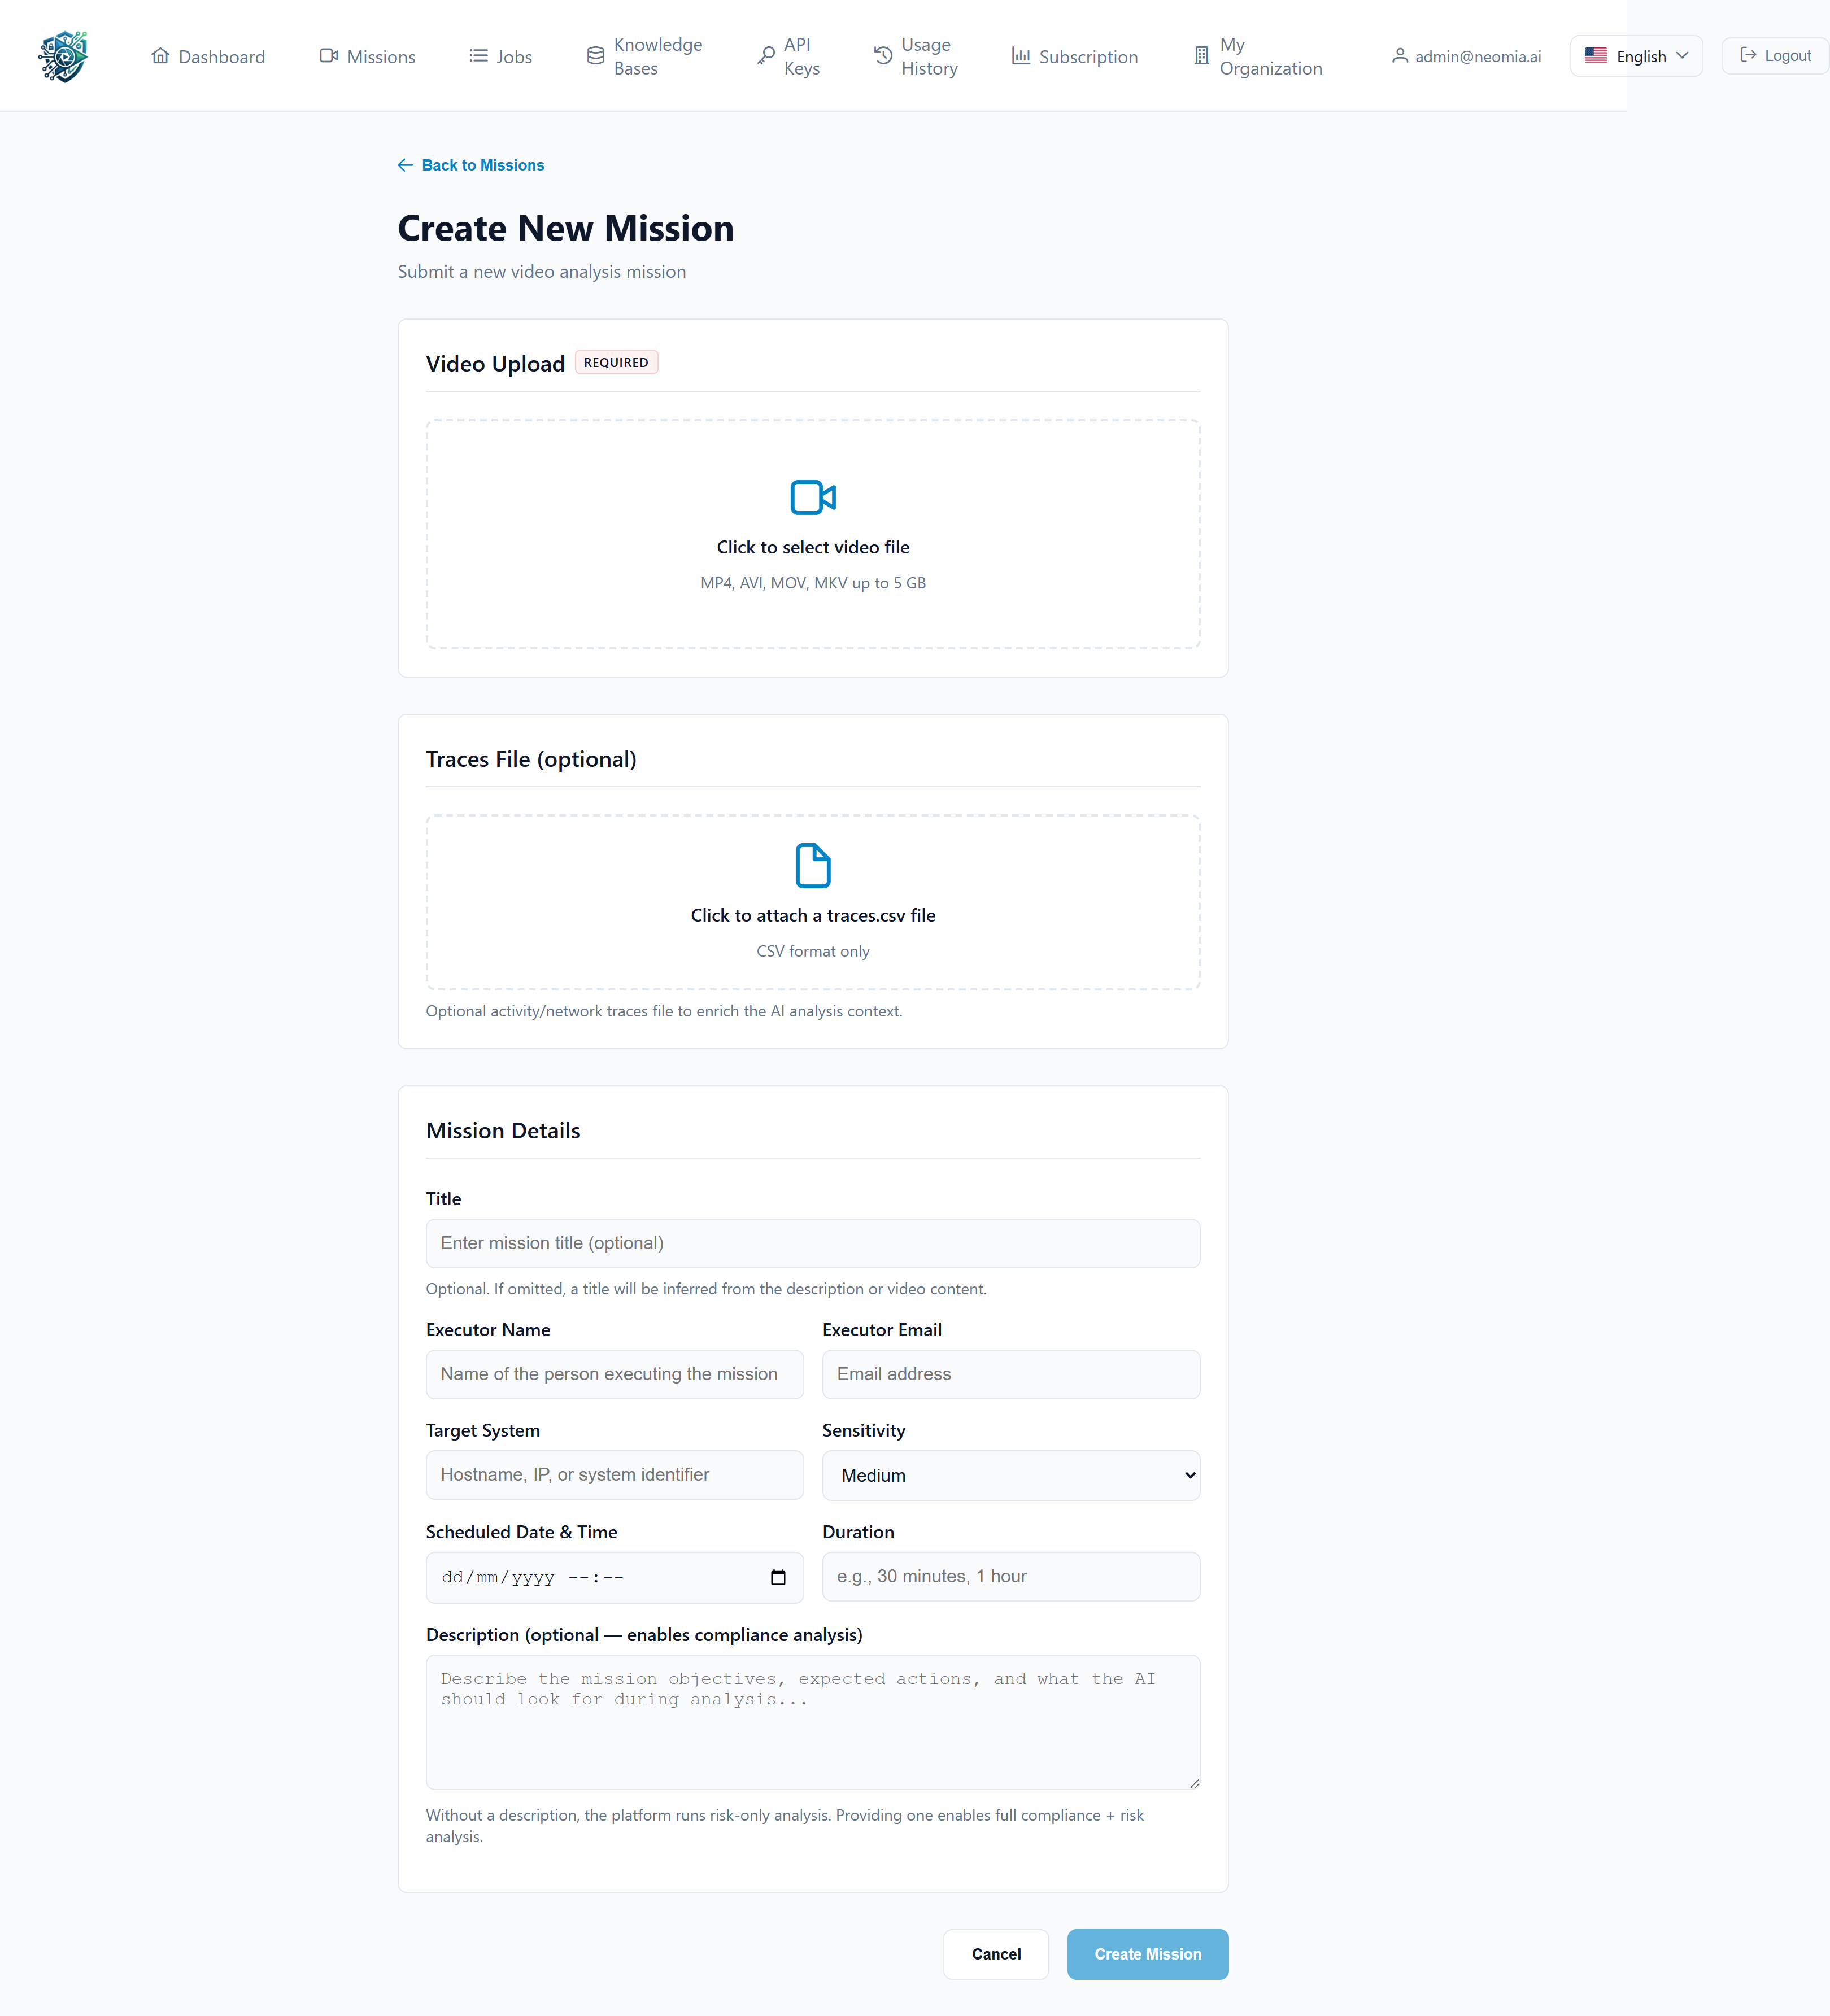
Section 1 — Video (required)
- Click the upload zone or drag a video file onto it.
- Accepted formats: any standard video container (MP4, AVI, MOV, MKV, WEBM, …).
- Maximum file size: 5 GB.
Once selected, the video appears in a preview player with its filename and size. Click Remove to choose a different file.
While the mission is being submitted, a progress bar shows the upload status (percentage and bytes transferred). The file is uploaded directly to neomia's secure object storage via a pre-signed URL.
Section 2 — Traces (optional)
If you have a CSV file containing the execution traces of the action (for example, logs exported from the target system), you can attach it here. neomia Lens uses this file to correlate timestamps in the video with concrete events.
- Accepted format:
.csvonly. - Click Remove to detach the file.
If you do not have a traces file, you can skip this section entirely — the AI analysis will still run on the video alone.
Section 3 — Mission details (optional)
All fields in this section are optional, but they make the resulting analysis report easier to understand and search. Provide what you can:
| Field | Description |
|---|---|
| Title | A short, recognizable name. Defaults to the video filename if left empty. |
| Executor name | The person performing the action in the video. |
| Executor email | Their email — useful when filtering missions later. |
| Target system | The application, server, or environment on which the action was performed. |
| Sensitivity | One of Low (green), Medium (yellow), or High (red). Helps the AI weight risk-related findings. |
| Scheduled date | The date and time the action was actually performed. |
| Duration | Expected or measured duration of the operation (free text). |
| Description | A free-form description of the context, objectives, or any constraints the AI should be aware of. |
When you are ready, click Create Mission. The submit button is disabled until at least the video is selected.
Do not close the page during upload
The upload happens in your browser. Closing the tab before the progress bar reaches 100% will interrupt the upload and the mission will fail. Once the bar reaches 100% you can safely navigate away — the analysis continues on the server.
2. Following a mission
After submission, you are redirected to the mission detail page. From there, and from the Missions list, you can watch the status badge change as the mission moves through the pipeline:
| Status | Meaning |
|---|---|
| Pending | The mission has been registered and is waiting to start. |
| Uploading | Your video is being received by the platform. |
| Hash check | Integrity verification of the uploaded file. |
| Guardrails | Safety and policy checks before analysis. |
| Media processing | The video is being decoded and prepared (frame extraction, deduplication, etc.). |
| Cluster formation | Similar frames are grouped to optimize analysis. |
| In progress / Analyzing | The AI models are running. |
| Completed | Analysis finished successfully. |
| Partial | Analysis finished, but some steps were skipped or degraded. |
| Rejected | The mission was refused by the guardrails (for example, unsupported content). |
| Failed | The mission could not be processed. The error reason is shown on the detail page. |
The list automatically refreshes every five seconds as long as at least one mission is still active, so you do not need to reload the page manually.
3. Browsing missions
The Missions page lists every mission you have access to.
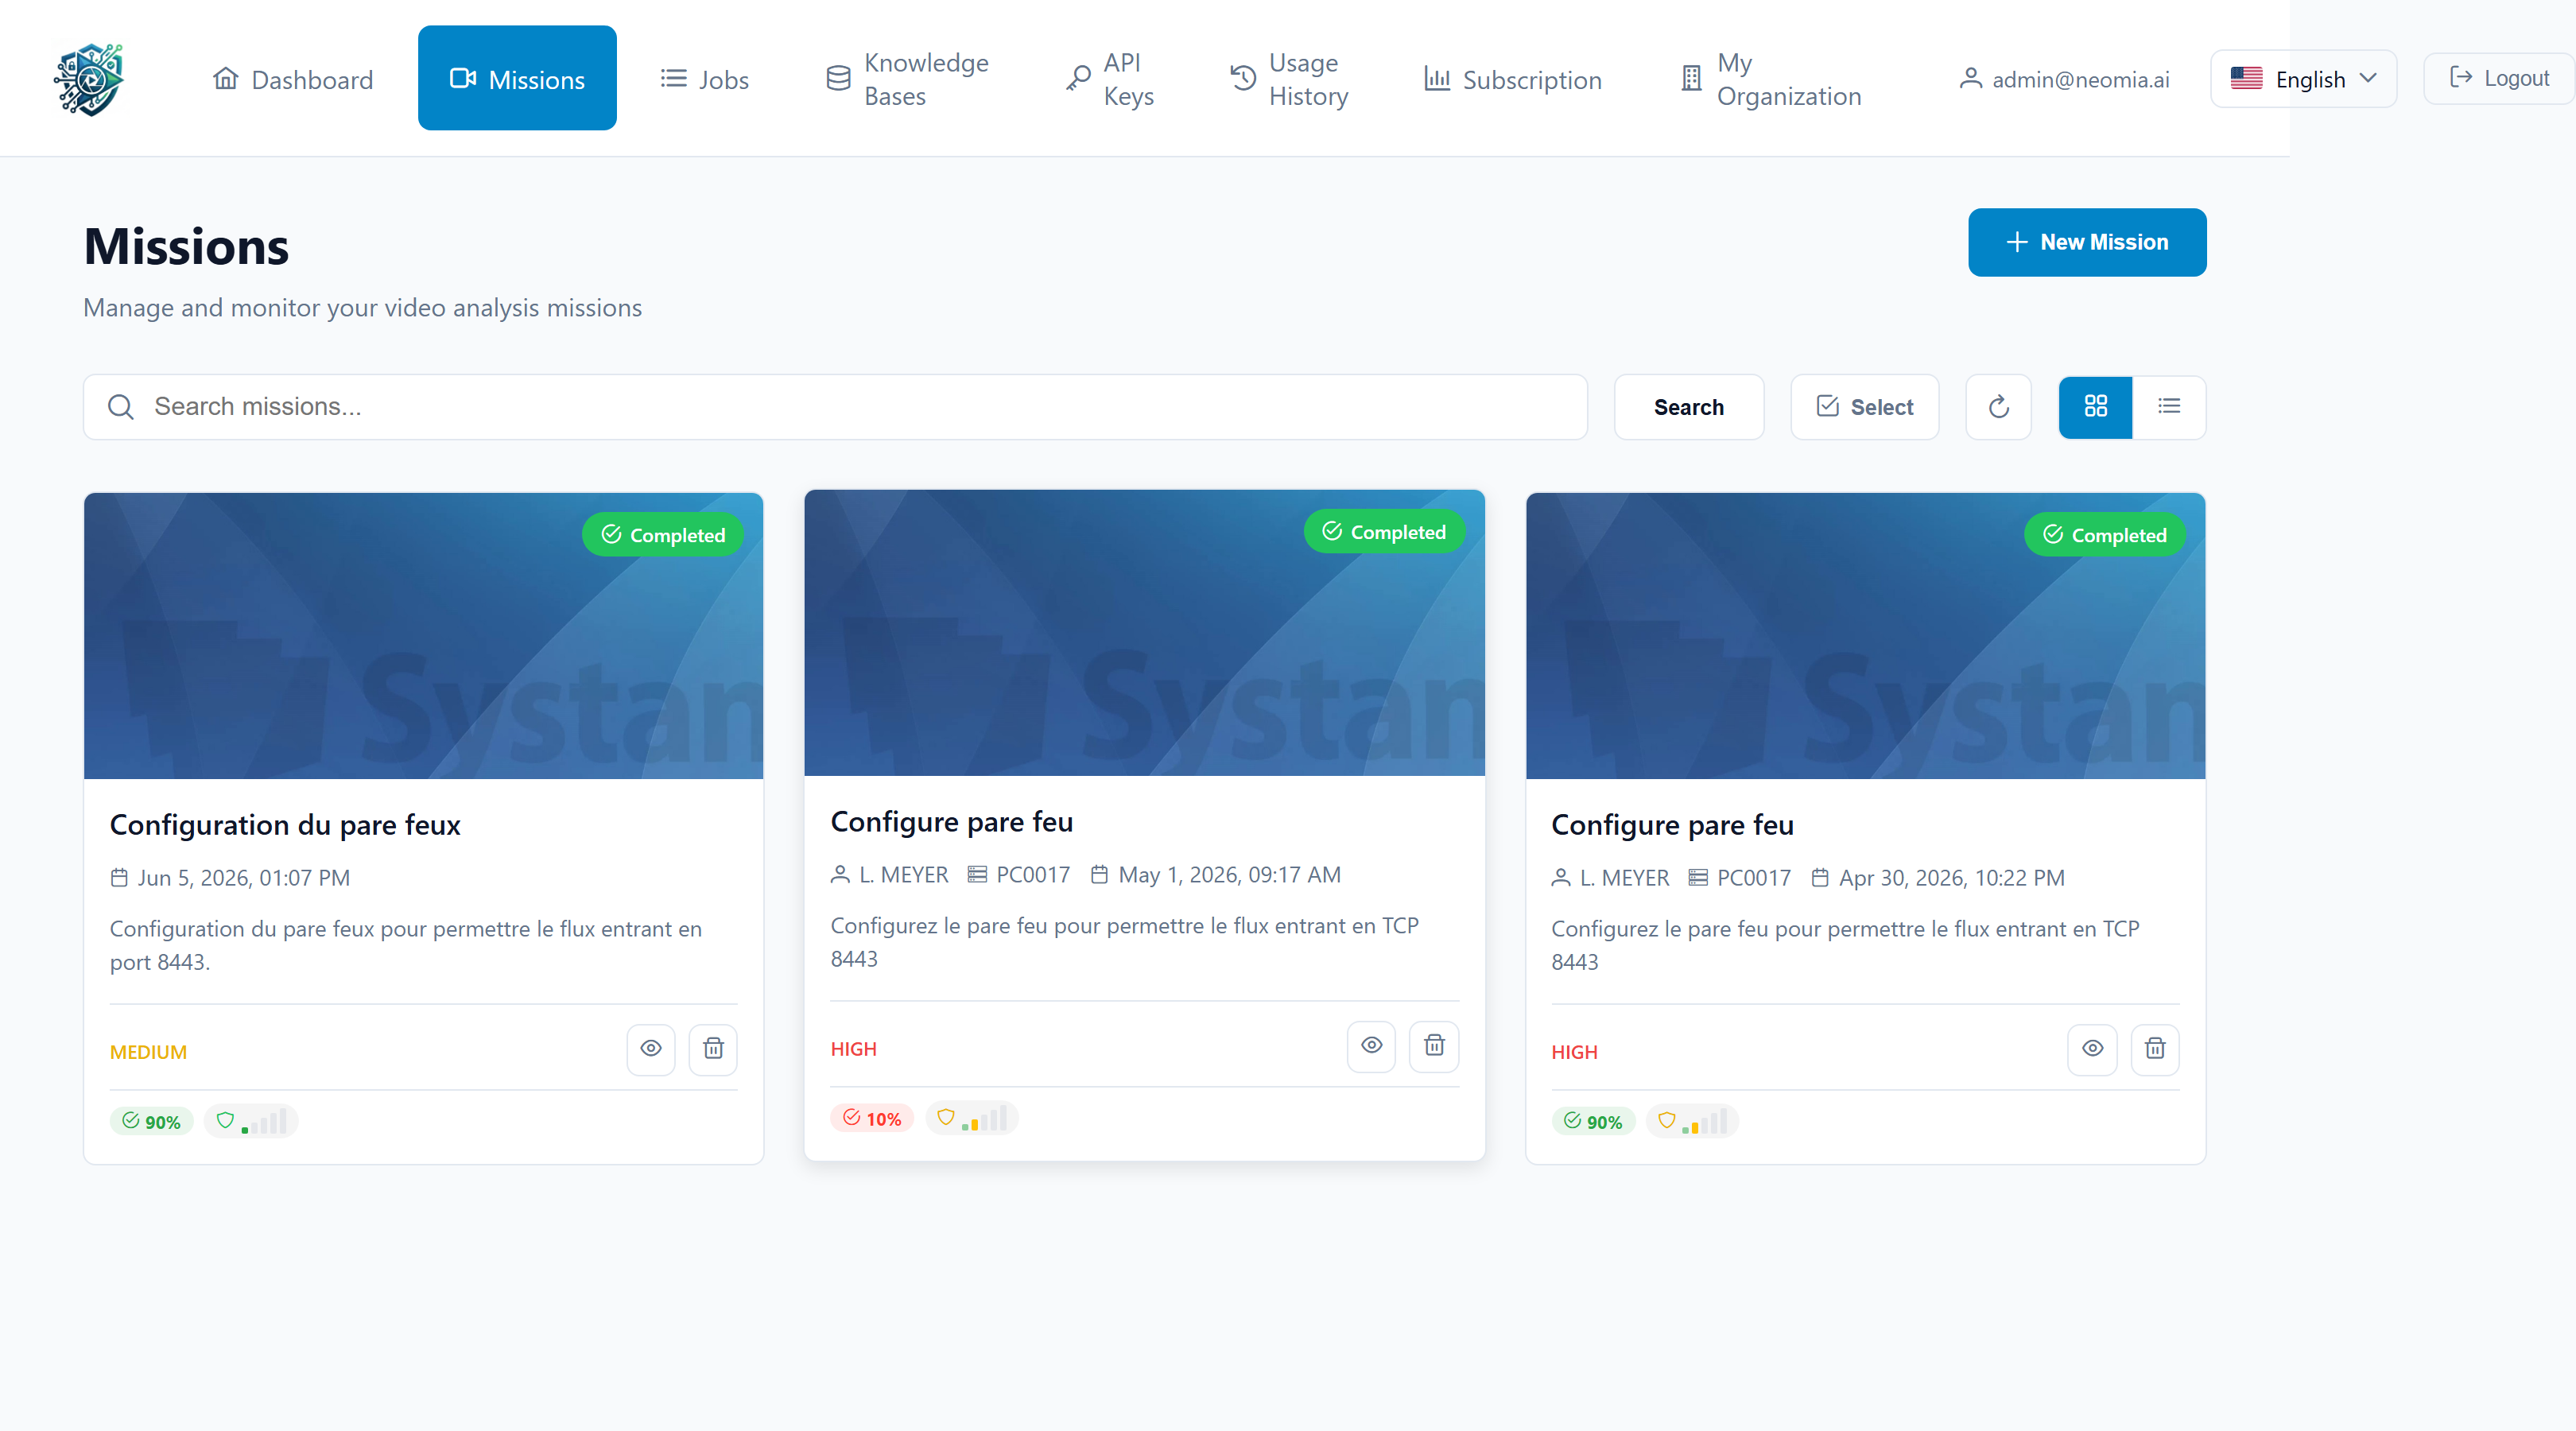
Search and pagination
- The search box at the top filters missions by title, executor, or target system.
- Results are paginated (12 missions per page by default).
Card view vs. list view
Use the toggle in the top-right corner to switch between:
- Card view — large tiles with a thumbnail extracted from the video.
- List view — a dense table with one row per mission.
Your preference is remembered the next time you open the page.
Mission row actions
Each mission exposes the following quick actions:
- View — open the analysis page.
- Delete — permanently remove the mission and its analysis (a confirmation dialog appears).
4. Batch operations
To act on several missions at once:
- Click Select to enter selection mode.
- Tick the missions you want to act on (or use the Select all checkbox).
- Click Delete selected and confirm the dialog.
Selection mode can be exited at any time by clicking Cancel.
Deletion is permanent
Deleting a mission removes its video, traces file, and AI analysis. This action cannot be undone. If your role requires audit retention, export the report (see Analysis Results) before deleting.