Integrate Pulse on Authentication Server by API
Abstract
This page presents the various features that must be added to an authentication server to add the Pulse MFA. Exchanges between the authentication server and the MFA will be carried out via API REST. To add neomia Pulse, modifications must be made to the Backend and Frontend of your authentication server.
Two connection scenarios are described in this document:
- The user is not known to Pulse (Onboarding).
- The user is known to Pulse (Authentication).
These two scenarios must be integrated into your authentication server. For each new technical element of a scenario, we've provided a link to our more detailed online documentation.
For further information, please contact the technical team by e-mail: dev@neomia.ai
Scenarios
Scenario 1 : Onboarding
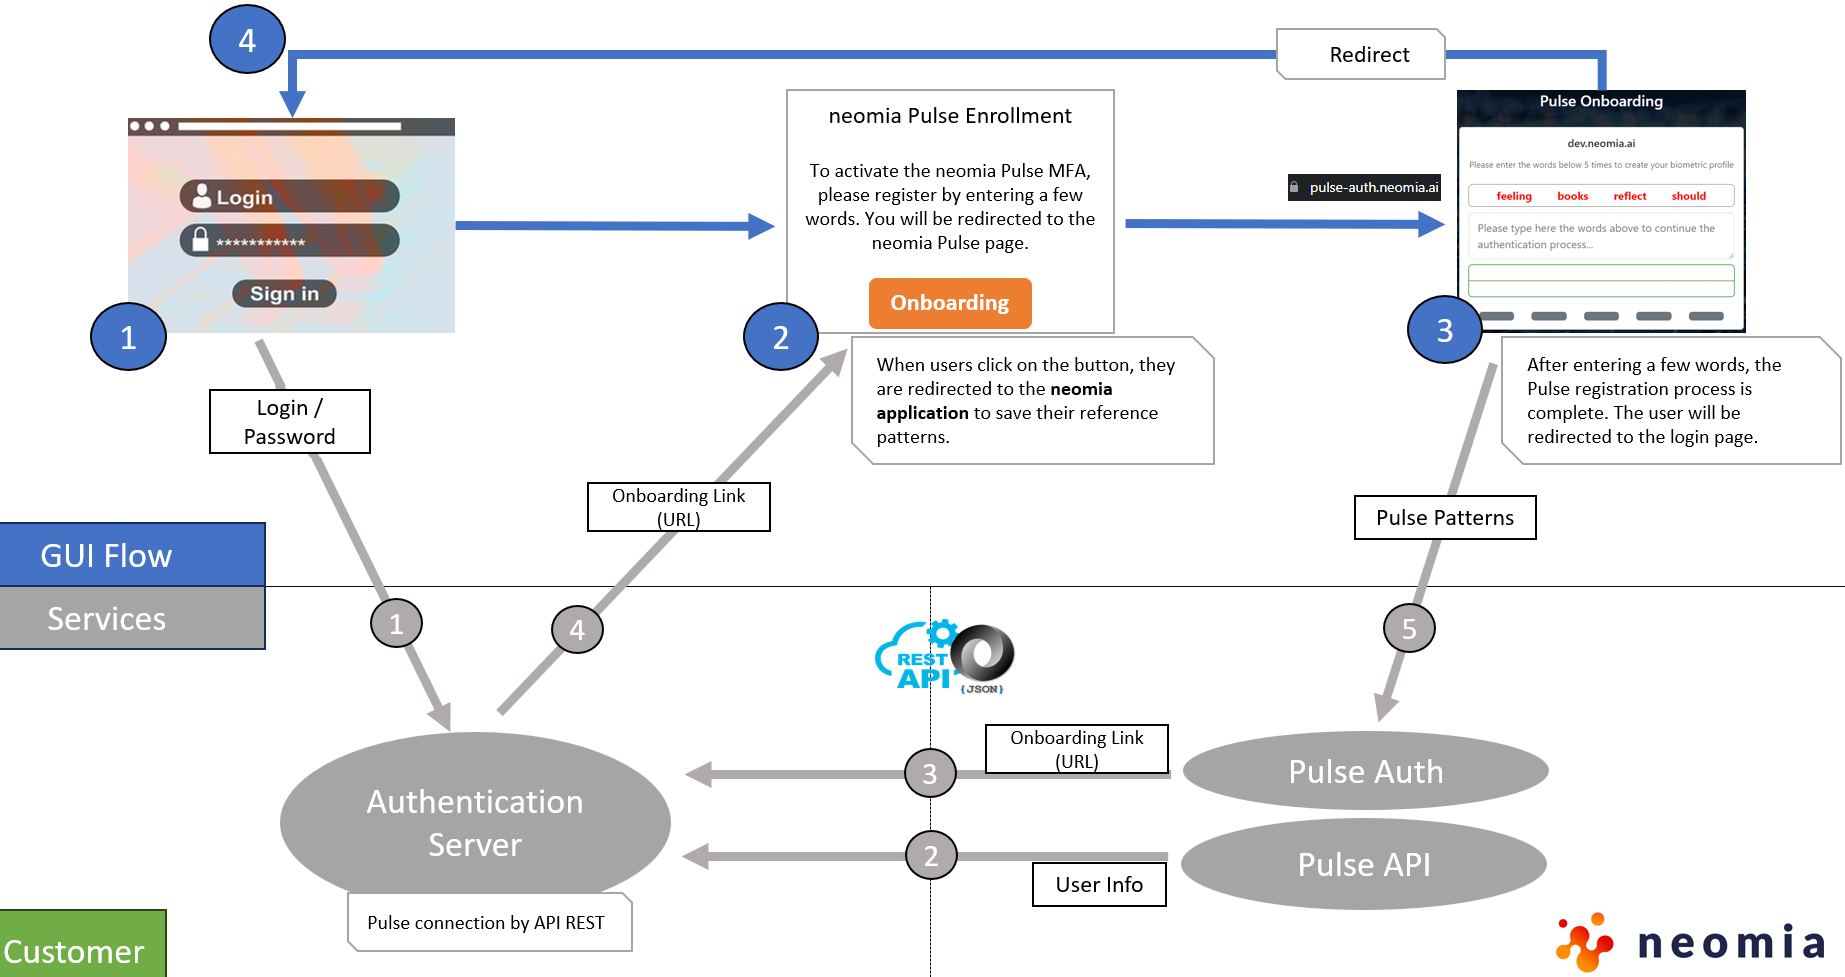
GUI Flow description (graphic steps)
- The user enters his login and password on the login page of the authentication server.
- If the credentials are valid, another page opens, prompting the user to register with MFA Pulse. When the user clicks on the "Onboarding" button, the user is redirected to the Pulse application.
- The user types in a series of words 5 times to record reference patterns. The patterns represent the user's keystrokes dynamics.
- When registration is complete, the user is automatically redirected to the login page authentication server login page
Description of exchanges between services
- The authentication server checks the validity of the identifiers.
- The authentication server checks that the user exists and is correctly registered on Pulse (in this example, the user does not exist). To perform this technical step, please refer to : Get User.
- The authentication server asks Pulse to generate a registration transaction. Pulse will return a link to provide to the user. To perform this technical step, please refer to : Auth API.
- The authentication server generates an information page and places the link in the "Onboarding" button.
- The reference patterns entered by the user on the Pulse application are saved and the registration is completed.
Scenario 2 : Authentication
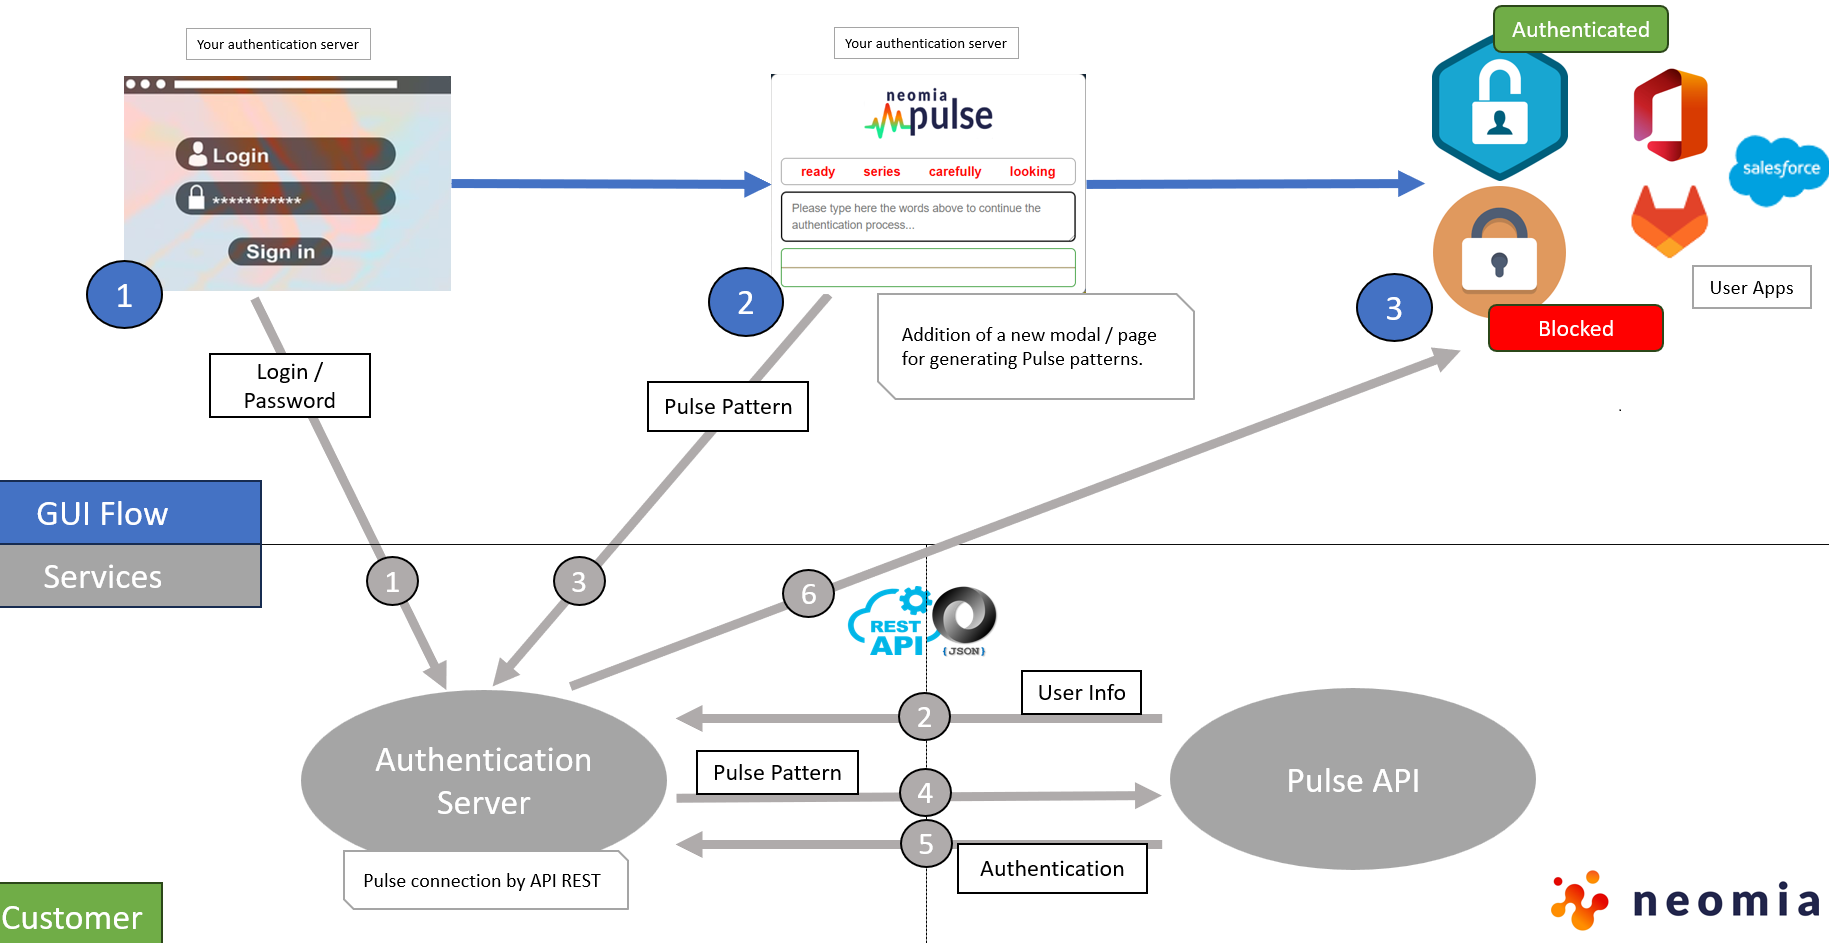
GUI Flow description (graphic steps)
- The user enters his login and password on the login page of the authentication server.
- If the credentials are valid, another page opens, prompting the user to type in a few words to record the typing dynamics. To perform this technical step, please refer to : BiometricPass Lib.
- If the behavioral biometrics have been recognized by Pulse, the authentication server authorizes the user to access applications
Description of exchanges between services
- The authentication server checks the validity of the identifiers.
- The authentication server checks that the user exists and is correctly registered on Pulse (in this example, the user does exist). To perform this technical step, please refer to : Get User.
- The authentication server asks the user to enter a few words to capture his typing and generate a pattern. The pattern retrieved by the authentication server.
- The authentication server asks Pulse to verify the pattern (Pulse checks that the keystroke is consistent with the legitimate user). To perform this technical step, please refer to : User Verify.
- Pulse returns an authentication message indicating whether the user has been recognized by Pulse.
- If Pulse has recognized the user, the authentication server authenticates the user.